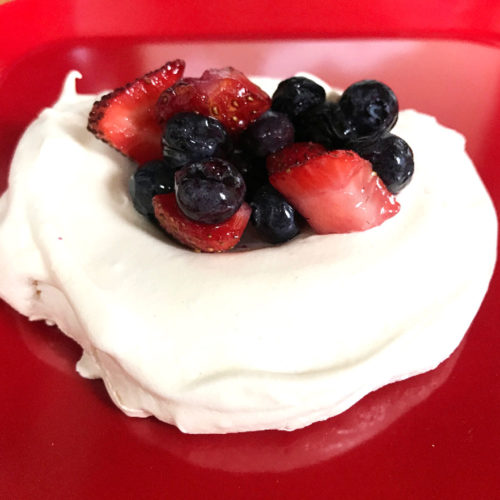
Crispy exterior + marshmallow interior = yummy pavlova

It’s the end of August, and I’m thinking about summer produce. With us traveling a bunch this summer, I haven’t cooked as much as usual. So, now that we’re home, I am excited to shop at the farmers market and incorporate locally grown items into our meals. There still are blueberries, which make a fine topping for these pavlovas.
The original post from July 2019
When I was a kid, there was a Portuguese bakery that my parents would go to occasionally. They had the most delicious Portuguese sweet bread, linguisa rolls, and an assortment of sweet treats. If I was lucky enough to go to the bakery, I was overwhelmed and delighted by the aromas. Plus, looking at their baked good case was so tempting. I loved their macaroons and chocolate chip cookies. My little brother, Dan, loved their meringues.
I remember trying one of Dan’s meringues. I was utterly disappointed. They were oddly dry and had this weird texture that just kind of melted in your mouth. I had no idea why people would eat them. Even now, I’m not a fan of meringues.
As I’ve watched numerous cooking shows and seen pavlovas, I’ve mentally turned my nose up them. I assumed they had to be very similar to meringues. Silly girl is all I can think in hindsight. Lesson learned- don’t judge what you don’t know. It applies to most things in life, and it should apply to food as well.

My moment of revelation occurred a month or two ago, as I watched a cooking show. I heard a chef describe the pavlova as a treat with a marshmallow center. And then my brain thought, “WAIT!” See, I love things with a marshmallow consistency. There’s something about that gooey, melted over the campfire texture that I can’t resist. Suddenly, I needed to try making pavlovas.
As I began my research and remembered past cooking shows, I saw that most people serve pavlovas with a topping. You’ll see that I did as well. However, for me, the most important part of the dessert is the pavlova itself. I eat it much like a cookie, although with a plate underneath to catch crumbs.
Whether you want to be traditional and top the pavlova with macerated berries, or be like me and eat the pavlova as is, that’s your choice. Either way I’m hoping you like them and possibly even introduced you to a new dessert that you otherwise might not have tried.


Pavlovas with (or without) Berries
Ingredients
- 1 cup granulated sugar
- 2 teaspoons cornstarch
- 4 large egg whites room temperature
- 1 teaspoon white vinegar
- 1 teaspoon vanilla
- 1 cup blueberries
- 1 cup diced strawberries
- 1 tablespoon granulated sugar
Instructions
-
Heat oven to 250 degrees F; line a large baking sheet with parchment paper.
-
Blend sugar on high in a food processor for 15 seconds.
-
Measure sugar again. (You need 1 cup; process more, if needed.)
-
In a small bowl, combine cornstarch and 2 tablespoons sugar.
-
Place egg whites in the bowl of a stand mixer, and beat on medium-high speed until foamy peaks form, about 1 to 2 minutes.
-
Gradually add plain, processed sugar, 1 tablespoon at a time, to the egg whites, beating until incorporated, about 1-2 minutes.
-
Add cornstarch mixture, 1 tablespoon at a time, beating until whites are stiff and glossy, about 1-2 minutes.
-
Add vinegar and vanilla; beat for 1 minute.
-
Using a spatula, spoon meringue into 8 mounds onto prepared baking sheet.
-
Using a butter knife spread each into 3-1/2" disks.
-
After that, using the back of a spoon, make an indent in the center of each.
-
Bake for 40 minutes.
-
Turn off the oven, and prop the door open, placing a wooden spoon in the opening.
-
Let pavlovas cool in the oven for an hour.
-
Combine blueberries and strawberries in a small bowl; sprinkle with sugar.
-
Stir well; allow to sit for at least an hour
-
Transfer the pavlovas from the baking tray to a cooling rack, allow to cool fully.
-
Top with berries, if desired.


